Posted on

Zelda Ocarian of Time Bomb

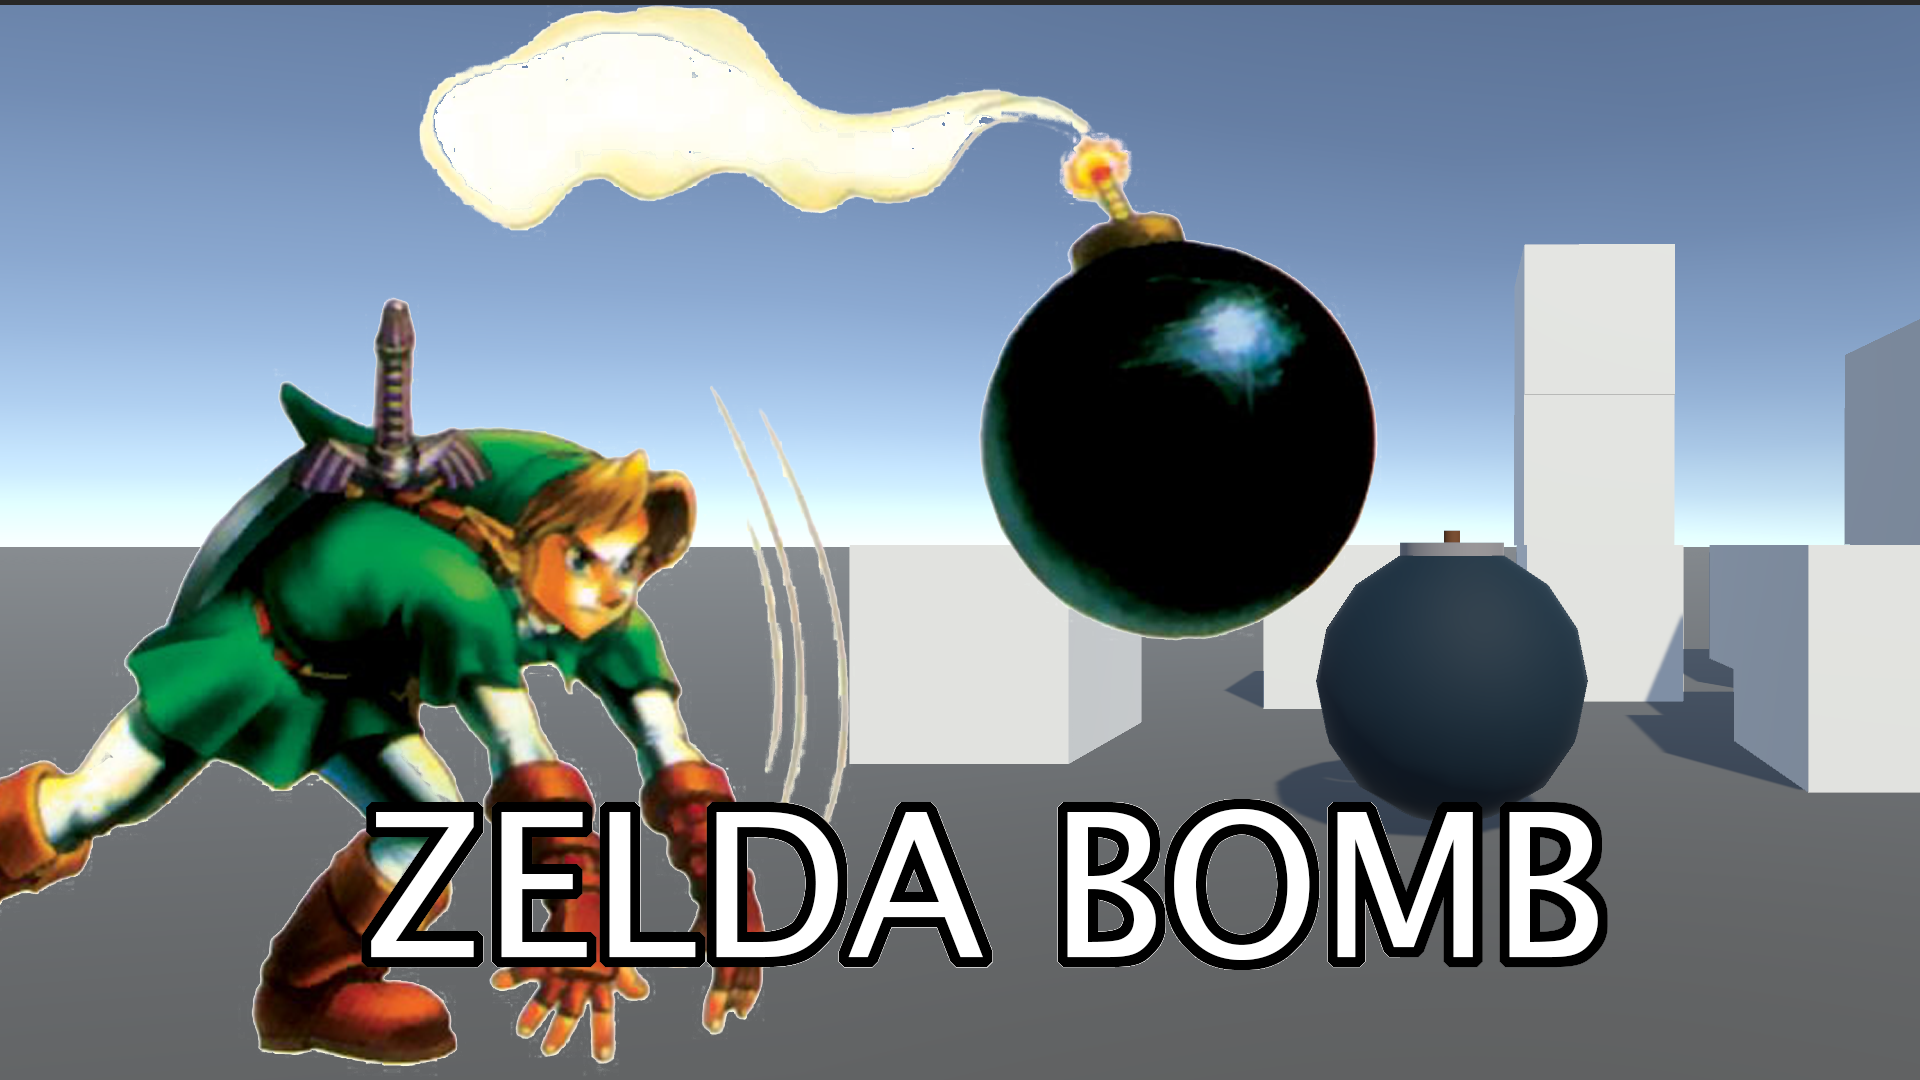
Welcome to our Unity video tutorials on how to create the Zelda bomb mechanic and prefab as seen in the classic game, Zelda Ocarina of Time.

In this tutorial, we’ll guide you through the process of creating the bomb mechanic, which involves creating a bomb that could be picked up and thrown by the player. We’ll also show you how to create a blink effect and bomb explosion. This prefab can be easily integrated into your game projects.

Our tutorials will cover a range of topics, including how to create the bomb object using Blender’s 3D modeling tools, how to program the bomb physics and behaviors using C#, and how to create the bomb explosion effect using particle effects and sound effects.

We’ll also demonstrate how to create a bomb prefab that can be easily dropped into any game project, making it simple to add the Zelda bomb mechanic to your own games.

Throughout the tutorial, we’ll provide clear explanations and demonstrations, making it easy for even beginners to follow along. We’ll also offer tips and tricks to help you optimize your bomb mechanic and make it as engaging and fun as possible.

By the end of this tutorial, you’ll have a complete Zelda bomb mechanic and prefab that you can integrate into your own game projects or use as a starting point for creating your own unique game mechanics.

Posted on

Zelda Ocarina of Time Falling Stairs

Welcome to our Unity video tutorial on how to create the Falling stairs game mechanic from the second level of the classic game, Zelda Ocarina of Time’s Dodongo’s Cavern.

In this tutorial, we will guide you through the process of recreating this iconic game mechanic step by step. We’ll start by breaking down the original game mechanics and discussing the design principles behind them. We’ll then demonstrate how to create the mechanics in Unity, using a range of tools and techniques.

Our tutorial will cover a range of topics, including how to create the falling stairs using Unity’s physics engine, how to add particle effects and sound effects to enhance the player experience, and how to program the game mechanics using C#.

Throughout the tutorial, we’ll provide clear explanations and demonstrations, making it easy for even beginners to follow along. We’ll also offer tips and tricks to help you optimize your game mechanics and make them as engaging and challenging as possible.

By the end of this tutorial, you’ll have a complete Falling stairs game mechanic that you can integrate into your own game projects or use as a standalone mini-game. You’ll also have gained valuable insights into the game design principles behind this classic game mechanic, which you can apply to your own game projects.

Posted on

How to Make a Color Picker in Unity

For this tutorial, I will show you how to create a color picker menu option in Unity. This will allow the players of your game to pick any color which can then be used for a number of different applications. You can have it change the color of an avatar’s clothes or hair. It could change the color of a car or a paintbrush like in Photoshop. The cool thing about this mechanic is that you don’t have to limit the players on what color they choose.

The way to create a color pick is that you first need to have a good texture 2D of a color wheel or pallet. If you need one you can download this Image.

You will then need to set up an event trigger on this image where you can take in the player’s mouse position. with this mouse position on this image, we can then get the pixel color at that position. Once you have the pixel color, you can use that color for whatever application you want.

ColorPickButton.cs

using UnityEngine;
using UnityEngine.Events;
using UnityEngine.EventSystems;
using UnityEngine.UI;

namespace InfoGamerHubAssets {

    public class ColorPickButton : MonoBehaviour
    {
        public UnityEvent<Color> ColorPickerEvent;

        [SerializeField] Texture2D colorChart;
        [SerializeField] GameObject chart;

        [SerializeField] RectTransform cursor;
        [SerializeField] Image button;
        [SerializeField] Image cursorColor;


        public void PickColor(BaseEventData data)
        {
            PointerEventData pointer = data as PointerEventData;

            cursor.position = pointer.position;

            Color pickedColor = colorChart.GetPixel((int)(cursor.localPosition.x * (colorChart.width / transform.GetChild(0).GetComponent<RectTransform>().rect.width)), (int)(cursor.localPosition.y * (colorChart.height / transform.GetChild(0).GetComponent<RectTransform>().rect.height)));
            button.color = pickedColor;
            cursorColor.color = pickedColor;
            ColorPickerEvent.Invoke(pickedColor);
        }
    }
}

DemoColorPicker.cs

using System.Collections;
using System.Collections.Generic;
using UnityEngine;

namespace DmeoInfoGamerHubAssets
{
    public class DemoColorPicker : MonoBehaviour
    {
        public void SetColor(Color newColor)
        {
            GetComponent<MeshRenderer>().material.color = newColor;
            //Debug.Log(newColor);
        }
    }
}